Welcome to Atom!
Hello! This blog post will walk you through the basic steps on how to set up and use Atom. Atom is an awesome and free text editing tool that allows you to write in Markdown and convert it into an html file.
Setting up Atom
First, let’s start by installing Atom onto your computer:
- Visit the Atom website
- Click Download and install
- You will get a bunch of welcome screens, but you can simply close them
- Next, you will click File and then New File
- If you do not want your lines going across the whole screen, you can click View and then Toggle Soft Wrap
- Now you are ready to start typing!
Downloading Packages
Our next step will be to download the necessary packages before we can get started on learning how to write cool syntax.
You will only need to download three:
- language-markdown
- markdown-writer
- markdown-preview
To install any package,
- Open the Package Manager
- Open settings
- Click Install (on OS X) or Open (on Windows)
- Search for the package you want to download (“Markdown”) into the search box
- Choose the package you want and then click Install
Writing in Atom
Here, I will walk you through how to create and open a new file and become familiar with syntax tips and tricks.
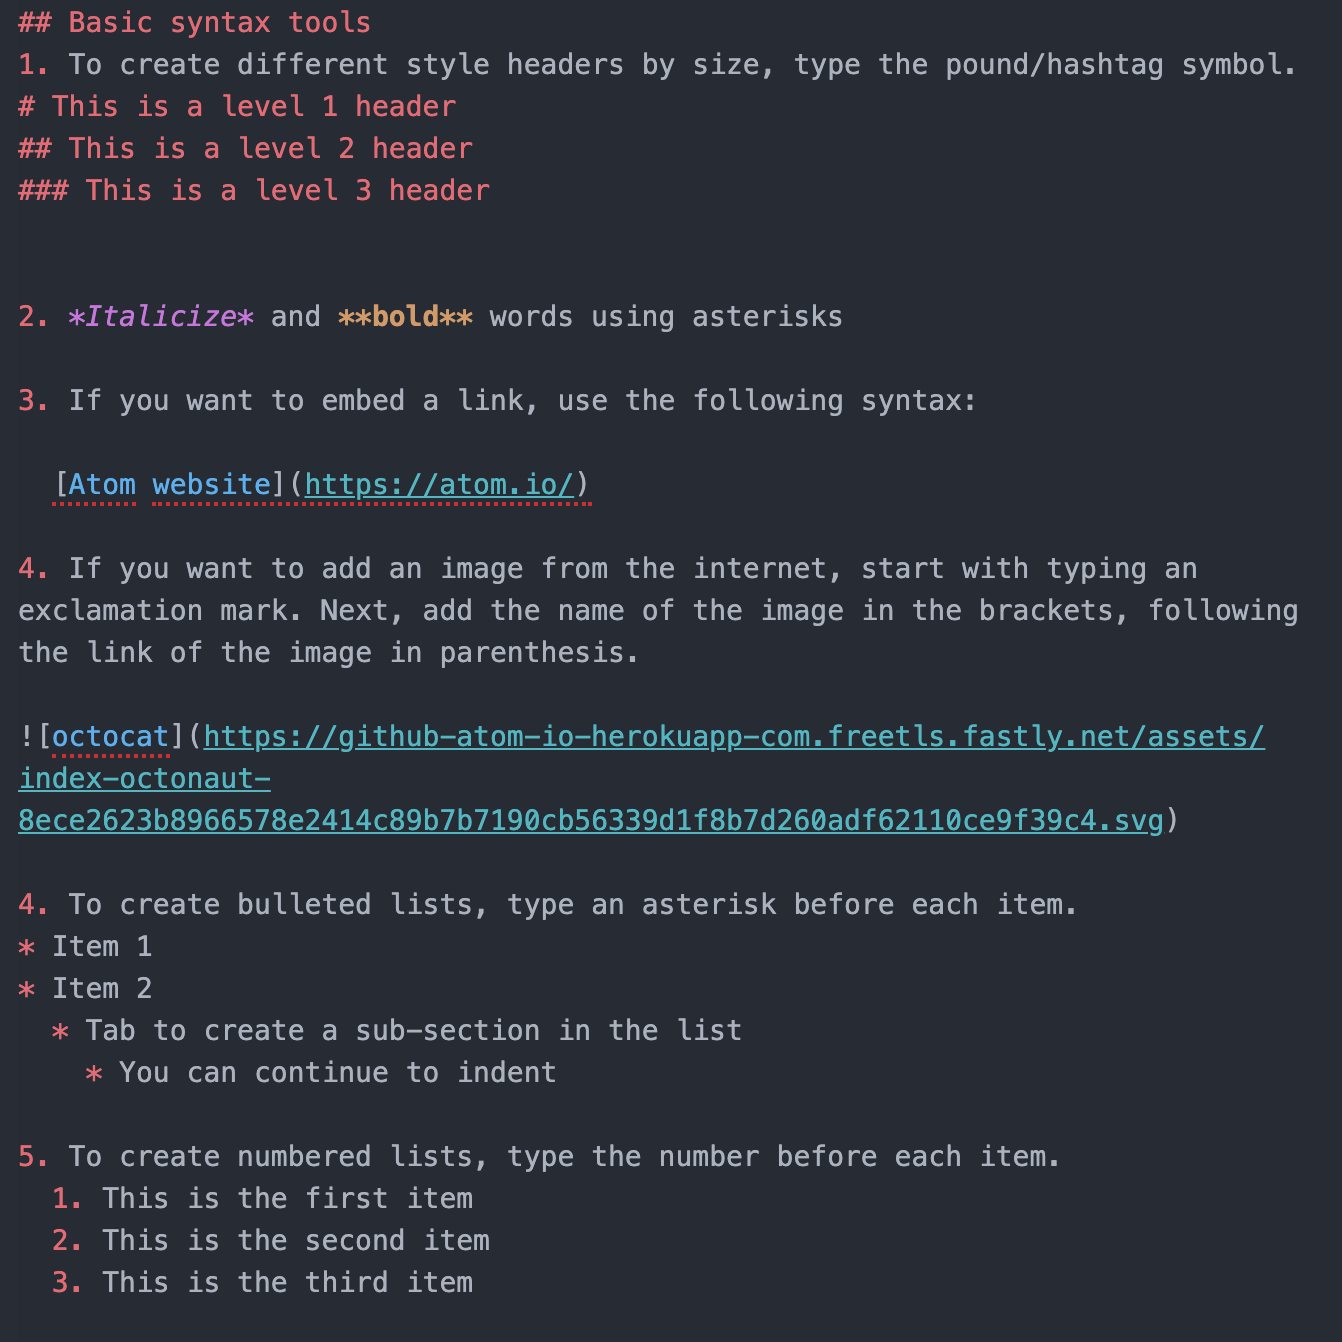
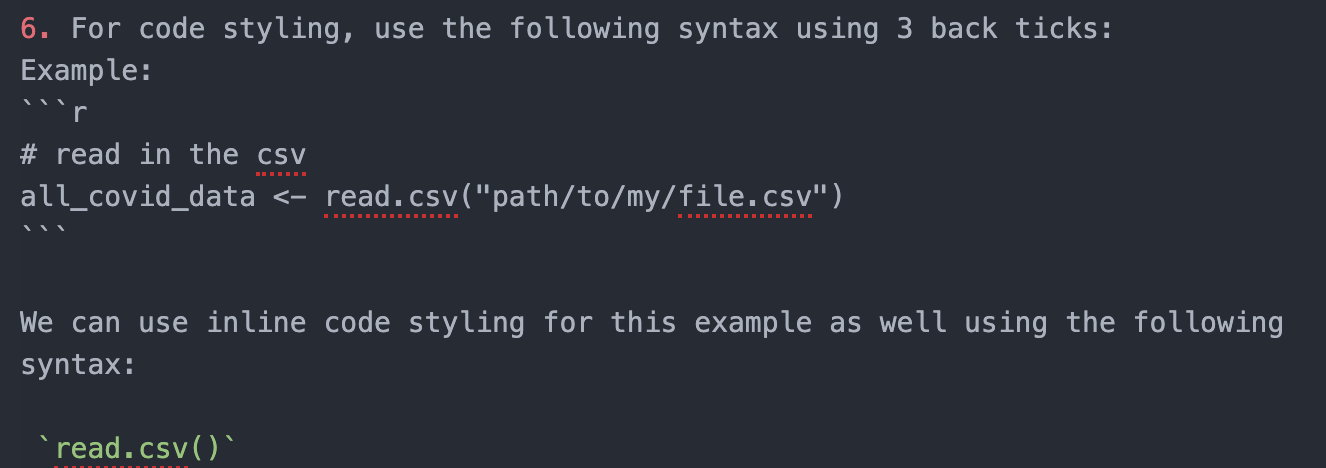
To start, open Atom and create a new file. Save the file as FILENAME.md, where FILENAME is whatever you would like to name the file. The .md extension tells Atom that this is a Markdown file. This will allow Atom to apply the right packages and syntax highlighting.
Basic syntax tools


Toggle preview
To view how your markdown file will appear as an HTML, you can use Toggle preview to split the screen. You can do this at the very beginning of your writing process to make sure it is appearing exactly how you want.
To get there, go to Packages » Markdown Preview » Toggle Preview
Converting Markdown to HTML
Our last step will be to convert your masterpiece into an HTML link.
- Make sure you have your Toggle markdown preview open using the previous steps
- Right-click in any blank area of the preview
- Click Copy (or Save depending on what you desire) As HTML
- Paste the result wherever you need it
Recap
This guide walked you through how to set up Atom and download its accompanying packages. It also helped you understand how to create and open new files & become familiar with Atom’s syntax tips and tricks. Lastly, it directed you on how to view your work as an HTML file and convert into one as well!
For more help…
Please look into the following links for more assistance on how to download, set up, and explore Atom.